How to Repair Resin Wicker Patio Furniture
Resin wicker patio furniture offers a durable and aesthetically pleasing option for outdoor seating and relaxation. Its resistance to weather and fading makes it a popular choice. However, even with its inherent durability, resin wicker can be susceptible to damage. Regular wear and tear, exposure to extreme weather conditions, and accidental impact can lead to unraveling, breakage, or other forms of deterioration. Consequently, understanding how to properly repair damaged resin wicker is essential to prolonging the life and maintaining the appearance of patio furniture.
The process of repairing resin wicker, while potentially time-consuming depending on the extent of the damage, is generally manageable with the right tools and a systematic approach. Successful repair restores the functionality and aesthetic appeal of the furniture, minimizing the need for costly replacements. The following sections outline the materials, tools, and step-by-step instructions required to effectively repair common types of damage to resin wicker patio furniture.
Identifying Damage and Gathering Materials
Before commencing any repair work, a thorough inspection of the resin wicker furniture is crucial. This involves identifying the type and extent of the damage. Common issues include broken strands, unraveling weaves, sagging seats, and damaged frames. Determining the specific problem dictates the necessary repair techniques and materials.
After assessing the damage, the next step is gathering the necessary materials and tools. The most vital material is replacement resin wicker. Ideally, the replacement wicker should match the original in terms of color, width, texture, and profile. Sourcing matching resin can sometimes be challenging, especially for older furniture. In such cases, contacting the manufacturer or searching online specialty retailers that offer a broad range of wicker types can be beneficial. If an exact match proves impossible, selecting a similar shade and texture can minimize the visual impact of the repair.
In addition to replacement wicker, other essential materials include:
- Adhesive: A strong, weatherproof adhesive is needed to secure the new wicker in place. Epoxy resins or specialized adhesives designed for plastics are generally appropriate.
- Matching Paint or Stain (Optional): If the replacement wicker is not an exact color match, paint or stain can be used to blend it in.
- Clear Coat Sealant (Optional): Applying a clear coat sealant after painting or staining can protect the repair and enhance its durability.
Essential tools for repairing resin wicker include:
- Sharp Utility Knife or Scissors: For cutting the replacement wicker to the appropriate length.
- Needle-Nose Pliers: For manipulating and weaving the wicker strands.
- Awl or Small Screwdriver: For creating space for the new wicker strands.
- Sandpaper (Various Grits): For smoothing rough edges and preparing surfaces for adhesive.
- Clamps: To hold the wicker in place while the adhesive dries.
- Measuring Tape or Ruler: For accurate measurements.
- Safety Glasses and Gloves: To protect eyes and hands during the repair process.
Having all materials and tools readily available before starting the repair process ensures a smoother and more efficient workflow.
Repairing Broken or Unraveled Weaves
One of the most common issues with resin wicker patio furniture is broken or unraveled weaves. This can occur due to stress, impact, or simply the gradual degradation of the material over time. Repairing broken or unraveled weaves involves several steps, focused on carefully replacing the damaged sections with new resin wicker.
Step 1: Preparing the Damaged Area: Begin by carefully removing any loose or frayed ends of the broken wicker strands. Use a utility knife or scissors to make clean cuts. If the surrounding weave is tightly packed, an awl or small screwdriver may be necessary to gently create space for the removal of the damaged section and insertion of the new wicker.
Step 2: Measuring and Cutting Replacement Wicker: Measure the length of the section that needs to be replaced, adding a few extra inches to each end for overlap and securing. Cut the replacement wicker to the measured length using a utility knife or scissors. Ensure the cut ends are clean and free of any frayed edges.
Step 3: Weaving the Replacement Wicker: The process of weaving the replacement wicker depends on the pattern of the original weave. In most cases, it involves carefully interlacing the new strand over and under the existing strands, following the original pattern as closely as possible. Use needle-nose pliers to help manipulate the wicker and guide it through tight spaces. An awl or small screwdriver can also be useful for lifting existing strands to allow the new wicker to pass underneath.
Step 4: Securing the Ends: Once the replacement wicker is woven into place, secure the ends using adhesive. Apply a small amount of adhesive to the overlapping sections of the new and existing wicker. Press the ends firmly together and hold them in place with clamps until the adhesive is fully cured. The drying time for the adhesive might vary depending on the adhesive used. Refer to the adhesive's specifications for proper drying guidelines.
Step 5: Finishing Touches: After the adhesive has dried, inspect the repair for any loose ends or rough edges. Use sandpaper to smooth out any imperfections. If the replacement wicker is not an exact color match, apply paint or stain to blend it in with the surrounding weave. Allow the paint or stain to dry completely before applying a clear coat sealant, if desired.
This process is repeated for each damaged section until all broken or unraveled weaves are repaired. Maintaining the original weaving pattern is essential for ensuring the structural integrity and aesthetic appeal of the furniture.
Addressing Sagging Seats and Loose Supports
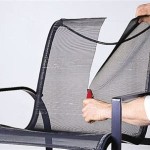
Beyond broken weaves, another common issue with resin wicker patio furniture is sagging seats. Sagging usually results from the stretching or weakening of the underlying support structure. Loose supports contribute to the overall instability of the furniture.
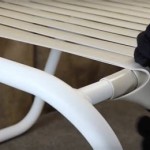
Step 1: Inspecting the Support Structure: Carefully inspect the underside of the furniture to identify the cause of the sagging. Check for broken or loose support bars, stretched webbing, or damaged frame components. The repair strategy will depend on the specific type of damage identified.
Step 2: Reinforcing or Replacing Support Bars: If support bars are broken or cracked, they will need to be reinforced or replaced. For minor cracks, a strong epoxy resin can be used to bond the pieces back together. Apply the epoxy to both surfaces of the crack and clamp the pieces together until the epoxy is fully cured. For more significant damage, it may be necessary to replace the entire support bar. Purchase replacement bars that match the original in terms of size and material. Secure the new bars to the frame using screws or bolts.
Step 3: Tightening or Replacing Webbing: If the webbing that supports the seat has stretched or become detached, it will need to be tightened or replaced. For minor stretching, use pliers to carefully pull the webbing tighter and re-secure it to the frame using staples or tacks. If the webbing is severely stretched or damaged, it is best to replace it entirely. Remove the old webbing and measure the dimensions for the replacement. Use a heavy-duty fabric or specialized webbing designed for outdoor furniture. Attach the new webbing to the frame using staples or tacks, ensuring it is securely fastened and evenly tensioned across the seat.
Step 4: Securing Loose Frame Joints: Loose frame joints can contribute to sagging seats and overall instability. Inspect all joints for looseness. Tighten any loose screws or bolts. If the joints are still loose, consider using wood glue or epoxy to reinforce them. Apply the adhesive to the joint and clamp the pieces together until the adhesive is fully cured. For severely damaged joints, it may be necessary to disassemble the joint and reassemble it with new hardware and adhesive.
Step 5: Adding Additional Support: In some cases, it may be necessary to add additional support to reinforce the frame and prevent future sagging. This can be achieved by adding additional support bars or braces to the underside of the furniture. These supplemental supports distribute the weight more evenly and enhance the overall structural integrity of the furniture.
Addressing sagging seats and loose supports significantly improves the comfort, stability, and longevity of resin wicker patio furniture. Proper reinforcement and repair prevent further damage and maintain the furniture's functionality.
Maintaining Repaired Resin Wicker Furniture
Once the resin wicker furniture has been repaired, implementing a proper maintenance routine is essential for preserving its condition and extending its lifespan. Regular cleaning and preventative measures mitigate the risk of future damage and maintain the furniture's aesthetic appeal.
Regular Cleaning: Consistent cleaning removes dirt, debris, and mildew that can damage the resin wicker over time. Use a soft brush or cloth and a mild soap solution (e.g., dish soap mixed with water) to gently scrub the surface of the furniture. Rinse thoroughly with clean water and allow the furniture to air dry completely.
Mildew Prevention: Resin wicker is susceptible to mildew growth, particularly in humid environments. To prevent mildew, regularly clean the furniture with a solution of water and bleach (diluted according to the bleach manufacturer's instructions). Alternatively, use a commercially available mildew remover specifically designed for outdoor furniture. After cleaning, ensure the furniture is thoroughly dried before storing or covering it.
Protecting from the Elements: Exposure to extreme weather conditions can accelerate the deterioration of resin wicker. Protect the furniture from prolonged exposure to sunlight, rain, and snow. Consider using furniture covers when the furniture is not in use, especially during harsh weather conditions. Storing the furniture indoors during the off-season is also a proactive measure to extend its lifespan. Alternatively, storing the furniture in a shed or garage during the winter months can prevent damage from freezing temperatures and snow.
Regular Inspections: Periodically inspect the resin wicker furniture for any signs of damage, such as broken strands, unraveling weaves, or loose supports. Addressing minor issues promptly prevents them from escalating into more significant problems. Catching and fixing small damages early on saves time and resources in the long run.
Applying Protective Coatings: Applying a UV-resistant coating to the resin wicker can help protect it from fading and cracking caused by prolonged sun exposure. Reapply the coating periodically according to the manufacturer's instructions.
By implementing these maintenance practices, owners can ensure that their repaired resin wicker patio furniture remains in good condition for many years to come. Regular care and preventive measures preserve the furniture's appearance, functionality, and value.

How To Repair Rattan Wicker Furniture Tools And Tutorial Rattanyard

Resin Wicker Patio Furniture Unraveling Hometalk

How To Repair Resin Wicker Chairs Using Glue Gun Atc Furniture 2024

Wicker Furniture Repair Guide Jessica Welling Interiors

How To Fix The L Off Broken Weaving Of Chair

How To Repair And Re Wicker Furniture Patio Ions

How To Repair Your Resin Wicker Outdoor Furniture Doityourself Com

Fix Rattan Garden Furniture Resin Wicker Repair Outdoor

How To Repair Outdoor Furniture Scratches Green With Decor

Atc Furniture How To Fix Poly Rattan Wicker 2024
See Also