How to Build a Natural Stone Patio
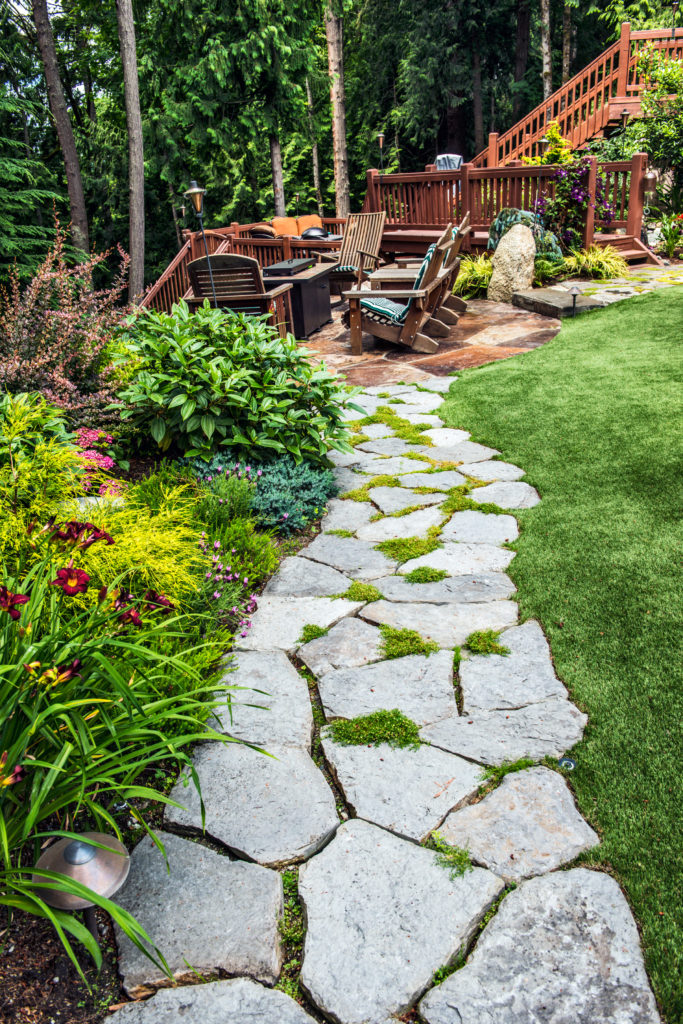
A natural stone patio can significantly enhance an outdoor living space, adding beauty, durability, and value to a property. Unlike concrete or pavers, natural stone offers unique variations in color, texture, and shape, contributing to a rustic and organic aesthetic. Constructing a natural stone patio is a labor-intensive project, but with careful planning, proper tools, and adherence to established techniques, a homeowner can successfully create a lasting and visually appealing outdoor feature. This article outlines the process of building a natural stone patio, emphasizing crucial steps and considerations.
Planning and Preparation
The initial phase involves meticulous planning and preparation. This encompasses site selection, design considerations, material selection, and necessary permits. Neglecting these preliminary steps can lead to structural issues, aesthetic inconsistencies, and project delays.
Site Selection and Assessment: Choosing the optimal location for the patio is paramount. Consider factors such as sunlight exposure, proximity to the house, drainage patterns, and existing vegetation. The area should ideally be relatively level, minimizing the amount of excavation needed. Evaluate the existing soil conditions. Poorly draining soil, such as clay, will necessitate more extensive base preparation to prevent water accumulation and potential frost heave. Check for underground utilities before digging. Contacting the local utility companies for a "locate" service is essential to avoid damaging buried lines. This service is typically provided free of charge.
Design Considerations: Determine the desired size and shape of the patio. Consider how the patio will be used and the number of people it will need to accommodate. Sketching a detailed plan, including dimensions and the proposed stone layout, is highly recommended. Think about the overall style of the landscape and choose stone that complements the existing architecture and surroundings. Consider incorporating features such as fire pits, seating walls, or planting beds into the patio design. Plan for proper drainage. A slight slope, typically ¼ inch per foot, is necessary to direct water away from the house and prevent puddling. This slope must be consistently maintained throughout the patio construction.
Material Selection: Natural stone is available in a wide variety of types, including flagstone, bluestone, granite, limestone, and slate. Each type offers unique characteristics in terms of color, texture, durability, and cost. Flagstone is a popular choice due to its relatively flat surface and ease of installation. Bluestone is known for its subtle variations in color. Granite is extremely durable and resistant to weathering. Limestone offers a softer, more textured appearance. Slate is a layered stone that can be split into thin sheets. Choose a stone that is appropriate for the climate and the intended use of the patio. Consider the thickness of the stone. Thicker stones are more durable and better suited for high-traffic areas. Estimate the quantity of stone needed based on the patio's dimensions and allow for waste due to cutting and breakage. Order approximately 10% more stone than the calculated amount to account for these factors. Select gravel for the base layer. Crushed gravel, typically ¾ inch in size, provides good drainage and compaction. Also, choose sand for the setting bed. Course sand is recommended.
Permits and Regulations: Before commencing any work, research local building codes and regulations. A permit may be required for patio construction, particularly if it involves significant excavation or impacts drainage patterns. Failing to obtain the necessary permits can result in fines and project delays.
Excavation and Base Preparation
Proper base preparation is crucial for the long-term stability and performance of the patio. A well-constructed base provides a solid foundation, prevents settling, and facilitates drainage.
Excavation: Mark out the perimeter of the patio according to the plan. Excavate the area to a depth of at least 6-8 inches. The depth will depend on the type of soil and the desired height of the patio. Ensure that the excavation extends beyond the planned patio dimensions by several inches to accommodate edging materials. Remove all topsoil, vegetation, and debris from the excavated area. Compact the subgrade (the exposed soil at the bottom of the excavation) using a plate compactor. This will provide a stable base for the gravel layer.
Gravel Base: Install a layer of crushed gravel, typically 4-6 inches thick. Spread the gravel evenly and compact it thoroughly using a plate compactor. Compacting the gravel in layers, rather than all at once, achieves better results. The gravel layer provides drainage and prevents the patio stones from settling. Ensure that the gravel base is level and sloped slightly away from the house to facilitate water runoff. Use a level and a measuring tape to verify the slope. A slight slope of ¼ inch per foot is generally sufficient.
Sand Setting Bed: Spread a layer of coarse sand, approximately 1-2 inches thick, over the compacted gravel base. This sand layer provides a smooth and even surface for setting the stones. Level the sand using a long, straight board or a screed. Ensure that the sand is uniformly compacted. Dampening the sand slightly before compacting it can improve its density. The sand layer should be perfectly level and follow the same slope as the gravel base.
Stone Installation and Finishing
The final stage involves laying the stones, fitting them together, and securing them in place. Attention to detail and careful craftsmanship are essential for achieving a visually appealing and durable patio.
Stone Placement: Begin laying the stones, starting from one corner or edge of the patio. Choose a consistent pattern or create a random arrangement, depending on the desired aesthetic. Fit the stones together tightly, leaving minimal gaps between them. Natural stone often has irregular shapes and sizes, requiring careful selection and placement to achieve a cohesive look. Use a rubber mallet to gently tap the stones into place, ensuring that they are firmly seated in the sand bed. Check the level of each stone with a level and adjust the sand beneath as needed. Maintaining a consistent level is crucial for preventing tripping hazards.
Cutting and Shaping: Cutting stones to fit irregular spaces or achieve a specific pattern is often necessary. Use a wet saw with a diamond blade for cutting natural stone. Safety glasses and hearing protection are essential when using a wet saw. Score the stone first before making a complete cut. This prevents chipping and ensures a clean edge. For smaller adjustments, use a hammer and chisel to shape the stone. Practice on scrap pieces of stone before cutting or shaping the actual patio stones.
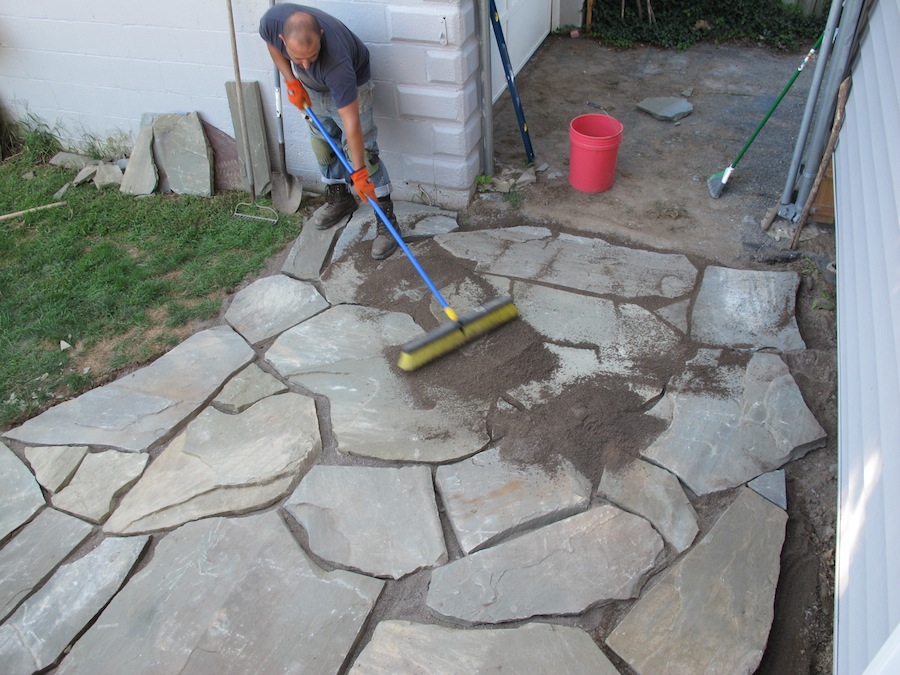
Filling the Gaps: Once all the stones are laid, fill the gaps between them with polymeric sand or stone dust. Polymeric sand is a mixture of sand and polymers that hardens when wetted, providing a durable and weed-resistant joint. Stone dust is a fine powder derived from crushed stone. To use polymeric sand, sweep it into the gaps between the stones. Compact the sand using a brush or a broom. Lightly mist the polymeric sand with water to activate the polymers. Follow the manufacturer's instructions carefully to ensure proper hardening. To use stone dust, sweep it into the gaps and compact it with a brush. Water the stone dust lightly to help it settle. Repeat the process as needed to fill the gaps completely. Alternatively, use smaller pieces of stone to fill the gaps, creating a more natural and rustic appearance.
Edging and Borders: Install edging materials around the perimeter of the patio to contain the stones and prevent them from shifting. Edging can be made from various materials, including metal, wood, or concrete. Secure the edging in place with stakes or concrete. Consider adding a border of contrasting stone to create a more defined edge and enhance the overall aesthetic. Borders can be made from smaller stones, such as cobblestones or brick.
Cleaning and Sealing: Once the patio is complete, clean the surface thoroughly with a broom or a pressure washer. Remove any debris, dust, or sand. Sealing the patio with a stone sealer can protect it from staining, weathering, and water damage. Choose a sealer that is specifically designed for natural stone. Apply the sealer according to the manufacturer's instructions. Sealing the patio will also enhance the color and texture of the stone.

How To Build A Flagstone Patio In One Day Merrypad

Flagstone Patios How To Guide Paving Cost Diy Vs Contractor Install Mutualmaterials Com

How To Build A Flagstone Patio In One Day Merrypad

5 Easy Diy Landscaping Ideas With Flagstone K2 Stone

How To Lay Flagstone Installation Guide Landscaping Network

How To Lay Flagstone Installation Guide Landscaping Network

Flagstone Patios How To Guide Paving Cost Diy Vs Contractor Install Mutualmaterials Com

How To Install A Flagstone Walkway True Value

How To Build A Stone And Brick Patio Diy The Family Handyman

Diy Patio Walkways How To Guide Estes Material S
See Also


