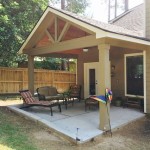
How to Attach a Ledger Board to a Stucco House for a Patio Cover
Creating a sturdy and weather-resistant connection between your stucco house and your new patio cover requires proper installation of a ledger board. This guide provides a step-by-step explanation of the essential aspects you need to know for a successful and secure installation.
Materials Required:
- Ledger board (typically pressure-treated lumber)
- Lag bolts (with washers)
- Concrete screws (with washers)
- Drill with appropriate drill bits
- Impact driver
- Level
- Masonry bit (if drilling into stucco)
- Caulk (for sealing gaps)
Step 1: Determine Ledger Board Placement
Mark the desired height and location of the ledger board on the house wall. Ensure it aligns with the supports of your patio cover and is positioned at the appropriate height for drainage.
Step 2: Install Flashing
Install flashing over the top of the ledger board to prevent water from entering behind it. Flashing should extend at least 6 inches beyond the edges of the ledger board and should be secured with concrete screws.
Step 3: Create Pilot Holes (for Stucco)
If installing into stucco, use a masonry bit to create pilot holes for the lag bolts. These holes should be slightly smaller in diameter than the lag bolts and should be deep enough to penetrate the stucco and into the underlying wood framing.
Step 4: Install Ledger Board (for Stucco)
Position the ledger board against the house wall and insert the lag bolts through the pilot holes. Use an impact driver to tighten the bolts securely into the wood framing. Ensure the ledger board is level and flush with the wall.
Step 5: Create Pilot Holes (for Concrete)
If installing into concrete, mark the locations of the concrete screws on the ledger board. Use a drill with an appropriate concrete bit to create pilot holes for the screws.
Step 6: Install Ledger Board (for Concrete)
Position the ledger board against the house wall and insert the concrete screws into the pilot holes. Tighten the screws securely using an impact driver. Ensure the ledger board is level and flush with the wall.
Step 7: Seal Gaps
Caulk any gaps between the ledger board and the house wall to prevent water infiltration. Use a caulk that is compatible with both stucco and wood.
Additional Tips:
- Use corrosion-resistant lag bolts and concrete screws for durability.
- Space the lag bolts or concrete screws no more than 24 inches apart.
- Consider using a ledger board connector for added strength at the connection point.
- Consult with a licensed contractor if you have any concerns or require professional assistance.
By following these steps and adhering to the additional tips, you can ensure a secure and long-lasting attachment of your ledger board to your stucco house for your patio cover.

How To Attch A Patio Ledger Stucco Home The Garage Journal

Attaching A Ledger To Frame Stucco Wall Remove Doityourself Com Community Forums Walls Pergola Patio Roof

Installing A Ledger On Stucco Tigerwood Decking

Installing A Ledger On Stucco Tigerwood Decking

Installing Stucco Above A Deck Ledger

Diy Patio Part2 Framing Roof

Attaching A Deck Ledger To Stucco Wall Greenbuildingadvisor

Attaching A Ledger To Frame Stucco Wall Remove Doityourself Com Community Forums

How To Attch A Patio Ledger Stucco Home The Garage Journal

Fastening A Patio Roof To The House Hometips
See Also


