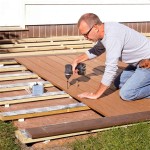
How to Construct a Patio on Sloped Ground: A Comprehensive Guide
Enhancing your outdoor space with a stunning patio can elevate your home's aesthetics and provide ample room for entertainment. However, navigating sloped terrain can present unique challenges. Here's a comprehensive guide to assist you in building a durable and visually appealing patio on sloped ground.
1. Assess the Slope
Accurately gauge the slope of your property to determine the necessary modifications. Use a builder's level or inclinometer to measure the angle and direction of the incline. This information will inform the design and construction techniques required.
2. Design the Patio
Plan the layout of your patio, considering the slope and drainage. Incorporate retaining walls or terraces to create level areas for the patio surface. Utilize steps or ramps to facilitate access from different levels. Ensure the design complements the surrounding landscape and architectural style of your home.
3. Choose Suitable Materials
Select durable materials that can withstand the challenges of a sloped patio. Concrete or stone pavers provide stability and longevity. Consider using permeable pavers to manage drainage effectively. Natural flagstone or tiles offer aesthetic appeal while providing varying textures and colors.
4. Excavation and Retaining Walls
Excavate the area as per the design, ensuring proper grading and drainage. If the slope is steep, construct retaining walls using concrete blocks, stone, or treated lumber to prevent erosion and support the patio. Consider incorporating drainage pipes or a French drain behind the walls to channel water away from the patio.
5. Drainage System
Proper drainage is crucial to prevent water accumulation and damage. Install a slope on the patio surface to direct water towards a drainage system. Use channels, pipes, or a dry creek bed to carry water away from the patio and downspouts. Consider underground drainage systems for larger patios to ensure effective water management.
6. Patio Installation
Lay the patio surface carefully, starting from the lowest level and working upwards. Ensure the pavers or slabs are level and secure. Use a polymeric sand or mortar to fill the joints and create a stable and cohesive surface. Consider adding edging or borders to enhance the aesthetics and prevent erosion.
7. Finishing Touches
Complete the patio by adding lighting, furniture, and other landscaping elements. Install lighting fixtures to enhance ambiance and safety at night. Choose outdoor furniture that complements the patio design and provides comfortable seating. Incorporate plants or raised garden beds to add greenery and create a welcoming atmosphere.
Additional Tips
Consult with a professional landscape architect or contractor, especially for complex or steeply sloped sites.
Use non-slip materials for the patio surface to ensure safety.
Consider incorporating fire pits, pergolas, or water features to enhance the outdoor experience.
Maintain the patio regularly by cleaning debris, resetting pavers, and inspecting the drainage system.

Diy Paver Patio On A Slope

Block Patio Slope Question Doityourself Com Community Forums
Building Paver Patio On Slope Pics Lawn Care Forum
Questions On Sloping A Raised Patio Lawn Care Forum

Behind The Build Sloped Backyard Transformation Master Spas Blog

How To Build A Raised Patio

Diy Raised Patio Part 1 3 Introduction Preparation Footings

Block Patio Slope Question Doityourself Com Community Forums Sloped Backyard Landscaping Raised

Can You Build A Patio On Sloped Yard Lawn Landscape

How To Build A Raised Patio With Retaining Wall Blocks
See Also


