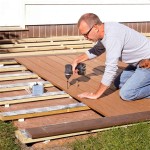
How To Build Patio Furniture: A Step-by-Step Guide for the Home DIYer
Building your own patio furniture is not as daunting as it might sound, as long as you have the right tools and proper guidance. Whether you're a beginner or have some experience with woodworking, the following guide will help you create durable and stylish pieces that will elevate your outdoor living space.
Materials and Tools Required:
- Pressure-treated lumber or cedar wood
- Galvanized nails or screws
- Wood glue
- Electric saw (circular or miter saw)
- Drill
- Countersink bit
- Measuring tape and pencil
- Clamps
- Optional: Outdoor stain or paint
Step 1: Plan Your Design
Start by determining the size and style of furniture you want. Draw a simple sketch to visualize your design. Consider the dimensions of your patio and the overall aesthetic you're looking for. Choose a material that is durable and weather-resistant, such as pressure-treated lumber or cedar wood.
Step 2: Cut the Lumber
According to your design, use your electric saw to cut the lumber into the required lengths and angles. Ensure that the cuts are clean and accurate. If using a miter saw, adjust the angle guide to accommodate angled cuts.
Step 3: Assemble the Frame
Start by assembling the frame. Apply wood glue to the joints and secure the pieces with galvanized nails or screws. Use a countersink bit to countersink the fasteners below the surface. Reinforce the corners with additional screws or brackets for added strength.
Step 4: Add the Supports
Cut and attach support braces to the frame. These braces provide stability and prevent the furniture from wobbling. Position the supports at regular intervals and secure them using the same method as for the frame.
Step 5: Attach the Slats or Cushions
If you're making a bench, use outdoor-grade slats to create the seat. Cut the slats to the desired length and space them evenly. Secure them to the frame using screws or nails. Alternatively, you can add cushions for a more comfortable seating experience.
Step 6: Finishing Touches
Once the furniture is assembled, sand any rough edges and apply a coat of outdoor stain or paint to protect it from the elements. Stain can enhance the natural grain of the wood, while paint can add a vibrant splash of color to your patio.
Tips for Success:
- Use galvanized fasteners to prevent rust.
- Pre-drill holes for screws to avoid splitting the wood.
- Allow ample drying time for the stain or paint.
- Consider adding a protective sealant to extend the furniture's lifetime.
- If you're unsure about any step, consult with an experienced woodworker or online resources.
Building patio furniture is a rewarding project that can transform your outdoor space. With careful planning and attention to detail, you can create durable and stylish pieces that will provide you with years of enjoyment.

25 Free Diy Outdoor Couch Plans How To Build

25 Free Diy Outdoor Couch Plans How To Build

25 Free Diy Outdoor Couch Plans How To Build

25 Free Diy Outdoor Couch Plans How To Build

25 Free Diy Outdoor Couch Plans How To Build

25 Free Diy Outdoor Couch Plans How To Build

25 Free Diy Outdoor Couch Plans How To Build

How To Build A Simple Pergola

Outdoor Furniture Assembly Services By Professional Installers Rona
How To Choose The Right Seating Bunnings
See Also


