How to Lay Patio Stones on a Slope
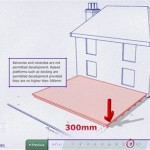
Creating a patio on a slope can add a beautiful and functional outdoor space to your home. However, it's important to take extra care when laying patio stones on a slope to ensure they remain stable and in place. Here are the essential steps involved:
1. Preparation
Start by clearing the slope of any vegetation, debris, or loose soil. Grade the slope to create a uniform surface with a slight downward angle for drainage. Mark the boundaries of the patio using stakes and string.
2. Edging
Install edging around the perimeter of the patio to retain the stones. Use materials like concrete blocks, metal edging, or paver restraints. Anchor the edging securely into the soil to prevent the stones from shifting.
3. Base Layer
Create a base layer for the patio using compacted crushed gravel or road base. Spread the material evenly over the prepared slope and compact it using a tamper or plate compactor. The base layer should be at least 6 inches deep.
4. Leveling Pads
To compensate for the slope, use leveling pads beneath the patio stones. These pads are typically made of plastic or rubber and come in various thicknesses. Place the pads under the stones to create a level surface.
5. Laying Stones
Start laying the patio stones from the bottom of the slope and work your way up. Use a rubber mallet to gently tap the stones into place, ensuring they are level and stable. Keep the joints between the stones as tight as possible.
6. Compacting
Once the stones are laid, compact them using a plate compactor or a heavy tamper. This process will firm up the base layer and ensure the stones are securely in place.
7. Drainage
Ensure proper drainage by creating a slight slope on the patio surface, directing water away from the house. Install a drainage system, such as a French drain or perforated pipes, to collect and drain excess water.
8. Sealing
To protect the patio from moisture and staining, apply a sealant specifically designed for outdoor stone surfaces. Follow the manufacturer's instructions carefully and apply multiple coats if necessary.
Tips:
- Consider using larger patio stones on a slope to reduce the number of joints and potential for shifting.
- Use a spirit level to ensure the stones are laid level and stable.
- Tamp the base layer and stones regularly during the installation process.
- Allow the patio to cure for at least 48 hours before walking or placing furniture on it.
- Inspect the patio regularly and make any necessary repairs or adjustments to maintain its stability and appearance.

Dry Laying Slabs On Gravel Or Sand Instruction Kronos Ceramiche Floor Coverings In Porcelain Stoneware

Is Installing Pavers On A Slope Difficult To Add Sequoia Stonescapes

How To Build A Garden Path Diy Family Handyman

How To Prep Lay A Base For Pavers Western Interlock

Dry Laying Slabs On Gravel Or Sand Instruction Kronos Ceramiche Floor Coverings In Porcelain Stoneware

Paver Patio Slope Diy Pavers Building A

Stone Paving Recommended Installation Details Boyle Patio Tralee

Building Paver Patio On Slope Pics Lawn Care Forum

Laying Patio Pavers Polycor Inc

How To Lay A Patio Expert Guide Laying Slabs Garden Ideas Tips Homebase
See Also


